Category Archives: tech tools

Embeddable Images in Google Drive

Issue: “I am using a third-party web tool that allows me to add images, if I provide a URL for the image. If I grab a URL from another website, it works fine. But, I have some of my own images. I want to upload them to Google Drive and use them. But, when I set them to “Anyone with the link” and get the URL, they still don’t work. The third-party tool tells me it can’t use that URL. Can I use Google Drive to store those images?”

Yes, you can.

This post does a great job of explaining a manual process you can use for making this work.

But, I thought it might be fun to try to use the power of Google Sheets to do some of this work automatically.

I have created a Google Sheet (make your own copy) that speeds up that conversion time. Open the Sheet, paste in the URL you get from “Copy link” in Drive, and the next two columns will give you the URL to use in your third-party application, and a thumbnail version of the image! If you don’t get the thumbnail image, then the modified URL is not working.

The technical side:

The URL for a copied link will look something like this:
https://drive.google.com/file/d/1GTs8L7Pg2B83RubkGBBa1c0jGyzC6pT4/view?usp=sharing

The URL for the “embeddable” version of the same image will look something like this:
https://drive.google.com/uc?id=1GTs8L7Pg2B83RubkGBBa1c0jGyzC6pT4

The same “file id” string appears in both, so it was just a matter of extracting that text and inserting it in the proper place of the embeddable format. The power of Google Sheets does it for you!

So if you are using a web tool that offers the ability to embed content from a public URL, and you want to use your own Google Drive folder to store that content, make a copy of this Sheet and give this a shot!

Active Learning

My role as a Technology Integration Specialist with Forward Edge has taken a twist this school year. I am supporting teachers in the Felicity-Franklin Local School District for the third year in a row. Two years ago, I was there two days a week. Last year, I was there three days a week. This year, I will be there every day they have school!

So, here’s the twist: I will still be supporting their implementation of educational technology, K-12. But this year, Felicity-Franklin is implementing a new makerspace, and I have been so fortunate to see it grow from an idea to a reality.

Our first two projects in the Active Learning Center are complete, and they were a great way to get started.

Student green screen video, standing at a crime scene.The Forensic Science high school class researched careers in the field, and created brief informational videos about them. They recorded their videos in front of a green screen, and used OBS (Open Broadcaster Software) to superimpose their videos on backgrounds that matched each topic.

Students build their prototype catapult.
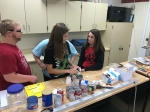
Several Agricultural Education classes participated in a
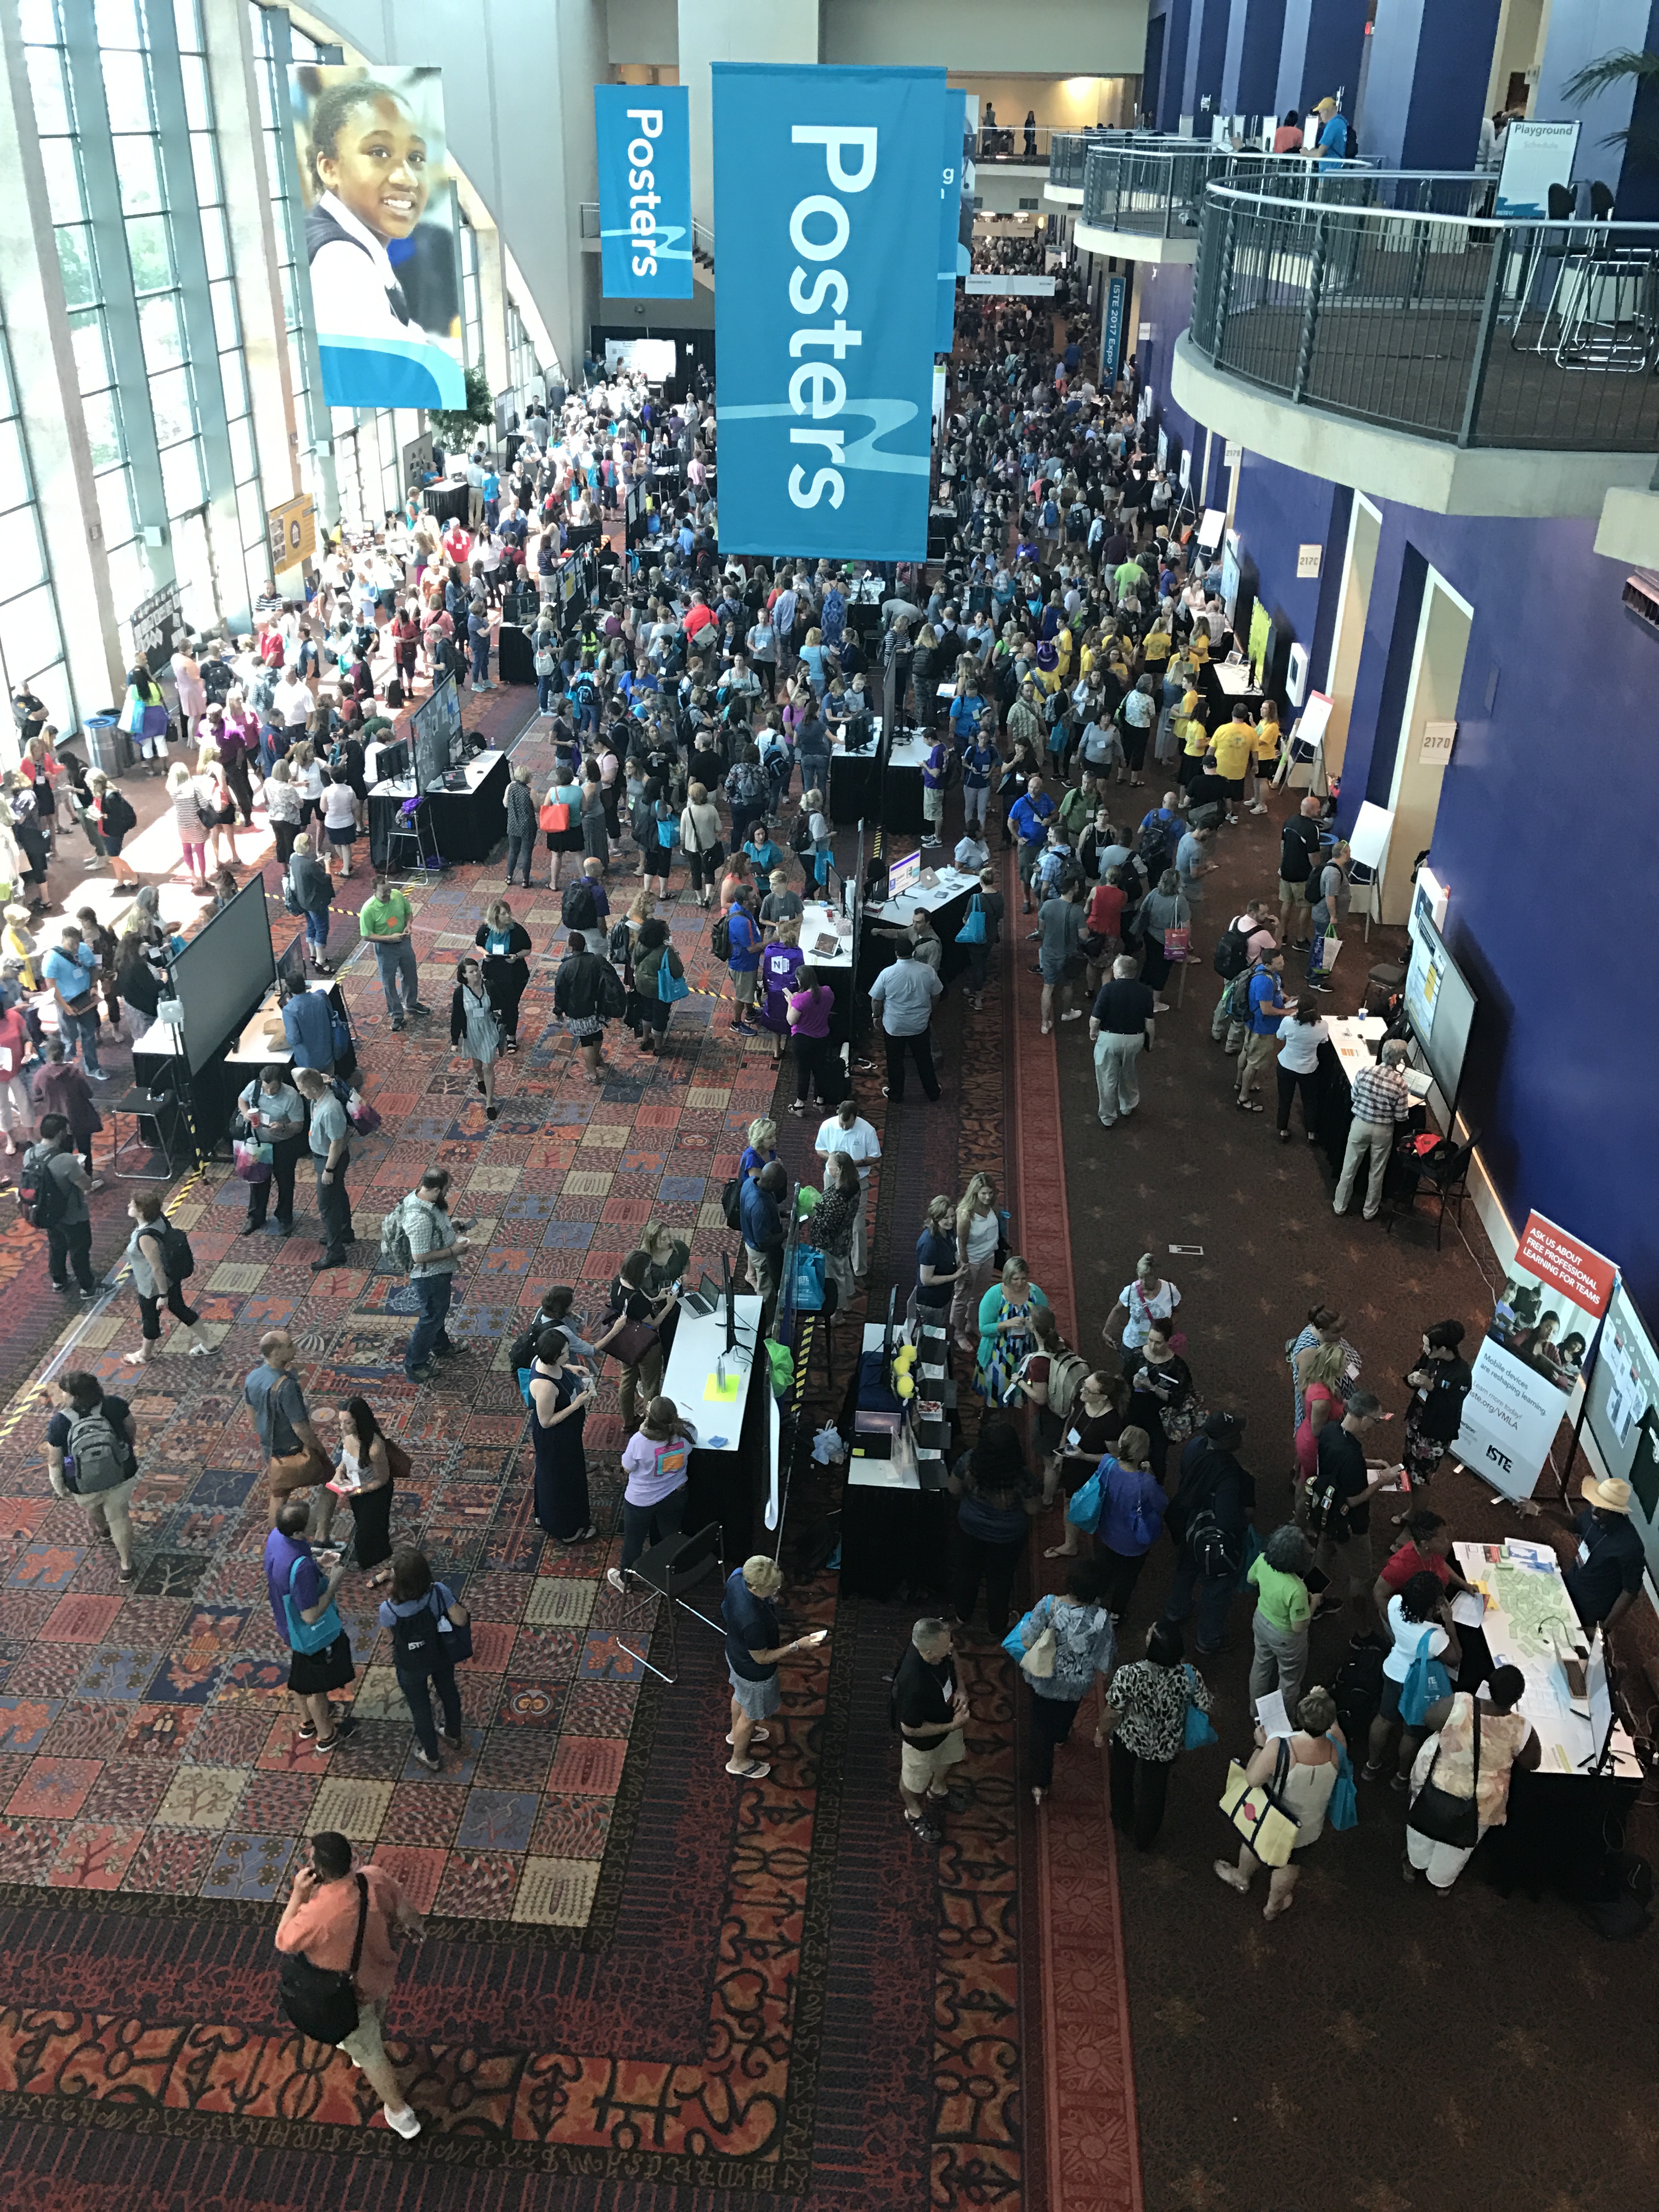
 Catapult Challenge. In this project, students had to design and build a device that would perform three different tasks.

Design Thinking and Learning-by-Making is built upon exploring questions that do not have a “one right answer”, and students get plenty of opportunity to brainstorm, build, test, refine, as many times as they need.

I heard students say, several times, “Let’s try both ways and see what works better.” “Can we try again?” “What if we…?” I never heard one student speculate about what their grade might be. They weren’t worried about a grade.

It was a little noisy. It looked a little chaotic at times. But, we had zero behavior problems.  Our makerspace is a little under 900 square feet, and our biggest class was 27 students.  It felt a little crowded at the “build space” when four or more teams wanted to use it, but we weren’t stepping all over each other.

Some students had the idea of using their school-issued Chromebooks (or their personal phones!) to research catapult designs to get ideas for where to start or where to improve their designs.  They were a little nervous to let the adults see them doing this.  They’ve grown up to believe that looking up an answer is against the rules.  But, when the question is constructed properly, looking things up is “research”, not “cheating.”

Perhaps my favorite observation came from the class using the green screen.  They were fairly hesitant to get in front of the camera to record their first video.  I had visions of the students “ooh-ing” and “aah-ing” over the technology and the opportunity to do something different!  In reality, everyone wanted to go last.  Eventually, the teacher imposed a list of who would go when, and the students complied. However, when they came back the second day, it was a completely different story.  I posted the videos from their first day in their online course management system, so they had a chance to see them before coming back.  When they returned to the makerspace, they were all ready to have a chance to do their video again.  They saw what they had done, and they saw that it could be watched by everyone else in their class.  Now, they wanted to do it better, and they knew where they needed to make improvements.

Try. Review and reflect. Refine. Try again. That type of approach to learning results in remarkable achievement.

Ten Best “Must-Try” Free Tech Tools for 2017-2018

Welcome to the start of the 2017-2018 school year!  The new year brings with it a new opportunity to try new things to support learning for all students.  Here are my top ten “must-try” free tech tools for this year!

10. Flipgrid – The “flip” in “flipgrid” comes from the concept of a flipped classroom.  Ignite discussion by creating a “grid” where students make video of their thoughts and ideas on a topic you post.  Super Cool Hack: Use this in language classes (foreign language or ASL) to post source material and translations!

9. Seesaw – A digital portfolio system for your students.  Students can submit materials as typed documents, photos, drawings, video, or links.  New to Seesaw, students can log in with their G Suite for Education account instead of scanning a QR code, and students can submit material from their Google Drive!  A great solution for early elementary students who are not ready for a full-blown LMS!

8. Read&Write for Chrome – You have to be using Google Chrome for this one, but the benefits are so good!  The free version gives you high-quality text-to-speech within Google Docs and PDFs.  Teachers can submit their e-mail address to get a free one-year (renewable) subscription to all of the paid features as well.

7. Edublogs – Your students can write for a global audience.  That’s a scary thought to many teachers, but the potential benefits are too vast to ignore.  If we want students to reflect on their learning, become effective communicators, and create authentic products, blogging is a great way to reach all students.  Built on the popular and powerful WordPress system, Edublogs provides an easy way for a teacher to create a single class blog and invite students to become contributors.  The teacher retains ultimate control of what becomes public, and students learn digital citizenship alongside of the content they are creating.

6. Canva – Digital Publishing and Graphic Design calls us to merge our content knowledge with creative expression.  But, basic productivity tools still assume an 8½”×11″ (or A4) format, based on the tyranny of printed paper.  Canva gives you “Publisher” type templates to start from, but in Infographic or other formats that defy traditional size restrictions.  Smash the boundaries!

5. Feedbro – I have rediscovered the value of RSS feeds!  Yeah, I follow certain people on Twitter or other social media platforms, and I learn a lot from them.  But, I can still miss important posts from certain people or organizations, and I don’t want to have to remember to visit their pages every day/week/month to see if there are any updates.  Feedbro lets me enter the RSS feed address for my favorite feeds and keep track of updates in one convenient location.  Versions available for Chrome or Firefox.

4. Iorad – Creating step-by-step tutorials and screencasts can be a great way to familiarize people with a long series of steps to perform online tasks.  Trouble is, these tutorials and screencasts can be very time-consuming to create.  Enter Iorad.  Start Iorad, and perform your task.  Iorad keeps track of where you click and what you type, and produces both a step-by-step tutorial with screenshots, and a screencast of the procedure you just performed.  Turn hours of tutorial production into minutes!

3. Recap – Recap takes multimedia student interactivity to another level by shifting the focus away from the teacher’s questions and to the student’s questions.  Queues, Journeys, and Video Responses offer exceptional flexibility in using this tool to provide asynchronous communication opportunities, and promote deeper thinking by students who interact with the system.

2. Book Creator – Book Creator has long been one of my favorite tools for the iPad and Android tablets.  Giving students the ability to create their own multimedia e-books can ignite a passion for learning, to become “published authors” with expertise in their chosen content area.  Now, this capability has been extended to the Chrome browser with the release of the newest version of Book Creator! Anything from short, simple picture books, to comprehensive advanced math and science texts (with built-in video examples!) can be produced with Book Creator.  And, if you need a powerful ePub reader to view your completed eBooks, try Readium!

1. iCivics – Anyone else out there seeing a renewed interest in civics education and how government works?  Just me?  Okay, then….  The mission of iCivics.org is to provide students (and anyone else, really) with immersive simulations into how government works, across all branches, at all levels from local to federal.  With Constitution Day coming up on September 17, iCivics is releasing a brand new version of its most popular game, “Do I Have a Right?”  Infinitely playable and replayable, the simulations at iCivics are great for introducing students to the complex and complicated world of representative democracy!

Which of these have you tried?  Any others that you love for 2017-2018?


#ISTE17 in San Antonio

IMG_0104The 2017 International Society for Technology in Education conference was held June 25-28 in San Antonio, Texas.  The event brought together over 20,000 people from around the globe to advance the cause of technology’s role in education.

I was privileged to be part of the team from my employer, Forward Edge, to attend ISTE.  Here is my “Mount Rushmore” of takeaways from the event.

  1. Listen to Stories – From the keynotes by Jad Abumrad, Jenny Magiera, and Reshma Saujani, to the hundreds of presentations, playgrounds, and poster sessions, one message kept coming back – Tell Your Story.  Human interaction as a learning experience in itself, and not just a vehicle for conveying information, is a foundational ideal in the world ISTE is pointing toward.  Technology makes it easier than ever to tell our stories.  While encouraging others (and ourselves) to tell our stories is important, a corollary to this postulate is needed to make it work – we must be willing to listen.  Many of the Ed Tech Coaching sessions I attended gave attention to this detail – we must be willing to listen more than we speak.  If everyone is constantly telling their story, nobody is listening. [More about the importance of telling one’s story at StoryCorps“New Yorkers Share Their Story for $1”, and the ISTE-featured table session “Humans of Education”]
  2. Include Everyone – One lingering question I had from my experience at ISTE 2016 Me, with student presenters Iker and Sebastian.was “All this stuff is great, but how in the world can you do some of these things in something other than large, suburban districts with multi-million dollar budgets?”  #ISTE17 fostered more of a global perspective, featuring far more approaches, mindsets, and even technologies that not only permit, but encourage, the “non-typical” participant.  The newly redesigned ISTE Standards for Educators do not just include “accessibility” as a standard.  Access for all, regardless of socio-economic status, disability, gender, race, or any other personally-identifying factor, is a sine qua non of the new standards, and of any equitable educational effort.
  3. Leverage Passions – “We want to learn. Make it fun!” was a pervasive theme of the student presentations at ISTE17.  In the midst of mounting frustration over a culture of hypertesting, educators are finding the resolve to flip the script.  Rather than starting with standards and herding students toward them (compliance-based), educators are finding joy and effectiveness in starting with student passions IMG_0140and exploring ways to make progress on standards within those passions.  There is zero evidence that standardized, boring instruction improves scores on standardized, boring tests.  So, whether it’s implementing coding, “making”, virtual reality, augmented reality, project-based learning, flipped classrooms, or any of a number of technological supports and instructional frameworks, it all feeds off the premise of connecting with what already resonates with our students.  And that requires taking the time to learn about them before asking them to learn anything from us.
  4. Build Efficacy – Expertise is a wonderful thing.  I know people who can do things better than I can.  As a matter of fact, there is absolutely nothing I can do that I am the best at.  The wrong thing to do with that realization is to stop doing them.  A much better response would be for me to learn from them in order to get better.  I will never be as good as they are, but I can be better than I am now.  And then, if I see my role as a Technology Integration Specialist in that same light, I can be a much more effective support for the teachers I have the privilege of working with.  I will learn from them.  And, with practice, they will learn from me.


Product vs. Process

Do you know who these two guys are?Norm Abram and Roy Underhill


The man on the left is Norm Abram, host of PBS’ “The New Yankee Workshop” and “This Old House“.  Norm is a master carpenter.  Norm also has a penchant for using a wide range of common and exotic power tools to create masterpieces.  It is not unusual to see him use a variety of tools, bits, and jigs in his projects.

The man on the right is Roy Underhill, host of PBS’ “The Woodwright’s Shop“.   Roy is a master housewright.  Roy focuses his efforts on time-tested, traditional woodworking methods.  Roy uses no power tools at all, sticking to hand tools and human-powered machines.

If I offered you a piece of furniture that had been made by one of these two master craftsmen, would you care which one made it before accepting it?

No?

Neither would I.  And that’s the beauty of how technology should work in education.  When “use of technology” is seen as the product of our educational efforts, we get unnecessarily distracted from what the real goal should be.  When “use of technology” is part of the learning process, then we are better able to decide when and where it makes the most sense, to support what we are truly trying to accomplish.

For example, “creating a Google Slides presentation” shouldn’t be the goal.  “Deliver a presentation to convince an audience to fund your project” is a much better goal – and if the student can use Google Slides to support that work, so much the better.

Technology can help us do some things faster.  Technology can help us do some things easier.  Technology can help us do some things better.  But, technology should not be the “end game”.

When you consider infusing technology into your instruction, do it for one of the following reasons: 1) technology makes a task possible that wasn’t possible otherwise, or  2) technology makes the task more engaging and results in a better product.   Anything else is just a distraction from the real end product.

It’s an old axiom in marketing: “When you buy a drill, you don’t really want a drill.  You want a hole.”  A great drill can help you make an exceptional hole, much faster and more accurately than a hand-drill would.  But, a great drill is not the goal.

When you start with a great real-world authentic learning goal, infusing technology to support that goal stands far less chance of being a roadblock to real learning!


Try Eyegaze on Windows!

Have you ever wanted to type on your Windows computer without using your hands or your voice?  A growing number of people are controlling the computer using little more than small head movements.  This technology, commonly referred to as “Eyegaze,” benefits users with motor issues that prevent them from operating a computer in ways that are considered basic to many people.  Such users may include those with ALS (aka “Lou Gehrig’s Disease”), Cerebral Palsy, or Muscular Dystrophy.

In its early days, eyegaze technology was incredibly expensive.  The only way most people who could most benefit from this technology could acquire it was by participating in medical or therapeutic studies where the cost of the technology was covered.

Now, you can download an eyegaze interface program to your Windows computer for free.  Actually, Camera Mouse is nearing its 10th anniversary as a freely available program, thanks to the people at Boston College.  When paired with on-screen keyboard software, everything that you could do with the keyboard and mouse can be done with your computer’s webcam, just by moving your head.

So, where can you get on-screen keyboard software?  In Windows, you already have it.  The one that comes with Windows is perfectly adequate.  In fact, the on-screen keyboard built-in to Windows 10 includes word prediction capability.  This can make eyegaze typing significantly faster.  Eyegaze typing typically works by registering a “click” after the mouse cursor stays in the same space for a set period of time (“dwell time”).

Simpler on-screen keyboard software is also available.  Two programs that are designed to work well with Camera Mouse and incorporate a text-to-speech option are Midas Touch and Staggered Speech.

I am typing this sentence using eyegaze and the Windows 10 on-screen keyboard.

Yes, it’s slow.  That sentence took me over one minute to type.  But for a person who cannot use a standard keyboard or speech-to-text technology, typing a sentence in 60 seconds is a gateway to a fundamental communication option that opens up meaningful participation in the world.  Once a user gets more practice with eyegaze technology, they generally will want the “dwell time” reduced from one or two seconds to a half-second or less.  If I were to practice, and tweak the software settings, I could soon get to a point where I can reproduce that sentence in under a minute.

And, thanks to the technology, if I store a commonly-used sentence in a memory bank, I can reproduce the sentence in far less time than it would take me to type it conventionally, with my 55wpm fingers.

So, why would you want to use Camera Mouse and the Windows on-screen keyboard?  Here are three great reasons!

  1. The Lure of the Gadget – Some people avoid unfamiliar technology because of a fear of it not doing what is expected.  Some people, on the other hand, just can’t resist trying a technology just to see what it does.  If you’re the type who has a natural curiosity for technological wizardry, eyegaze is a super-cool interface to try out!  Camera Mouse doesn’t disable your built-in keyboard and mouse, so any time you need to bail out and shut off the eyegaze tracker, you can do so easily.
  2. Contribute to advancement – Eyegaze technology – and other assistive technologies – continue to get better because of the feedback developers get from users who try their software and give them feedback.  Most advancements in software design and capability started with a user who said, “Y’know, it would be great if this could….”
  3. Build Empathy – If you ever encounter a person who relies on such technology, you will have first-hand experience with what they deal with – both the struggle and the possibilities.  Also, should you happen to work with an individual who has difficulty using typical computer interface controls (e.g., keyboard and mouse), you can more effectively introduce and support the use of eyegaze technology for that individual.  Supplementary or alternative interfaces such as eyegaze give people with significant motor impairments a way to use computers to do many things that typical people take for granted.

For the college course I am teaching, I plan to have each of my students take a turn at using Camera Mouse and an on-screen keyboard to type a sentence.  I will not be grading them on how fast they type the sentence.  I will not be grading them on how few mistakes there are.  I don’t even care (much) if they remember the name of the program we will use or if they practice and get better at it.  My goal is for them to build empathy for the kids they will one day work with who either rely on eyegaze technology to effectively communicate, or who could significantly benefit from such technology.  When the rest of the group is in a typing class, there is no good reason why a student who does not have the physical capacity to type on a standard keyboard should be given some alternate activity that has nothing to do with typing.

But, making that a reality in our schools will require the efforts of educators who demand equity and excellence for every student, regardless of any disability label they’ve been given.


Using goo.gl to Create a Shortened URL

After a recent set of workshops with teachers at Minford Local School District (Go Falcons!), one of the participants asked me for a quick tutorial on how to use goo.gl to create a shortened URL.

So, I used the Screencastify extension to create a quick video to show how I do it!

Using goo.gl to create a short URL

Thanks for the question, Lori! I hope the video is helpful!

Update: 2:32pm 1/21/2016, captioning should be available now for this video.

OCALICON 2015

Some of my favorite people in education work at OCALI (Ohio Center for Autism and Low Incidence).  Before I ever had a child of my own diagnosed with Autism, my work took me to OCALI on many occasions.  I have always had a great time working with the people there.

OCALICON 2015.Their flagship event every year is the national OCALICON in Columbus, Ohio.  This year, I will have the privilege of being at OCALICON for two presentations:

If you’re at OCALICON this year, say hi!

Tech Tools to Support the Five-Step Writing Process – INFOhio Webinar

INFOhioOn Thursday, November 12, from 3:30-4:30, I presented “Tech Tools to Support the Five-Step Writing Process” via webinar for the fine folks at INFOhio!

Check out a Voki intro of the session!

This webinar will highlight a few free tools you can use to support the Five-Step Writing Process (Pre-write, Write, Revise, Edit, and Publish) for students with diverse needs!

The webinar was recorded, so you can still view it.  And, if you answer five simple true-false questions after viewing the webinar, you can download a certificate and/or get a cool badge like this one!

Saving a Publisher file as a PDF

I have never been a big fan of Microsoft Publisher.  Too many quirky behaviors for my taste.  I spend more of my time figuring out workarounds than actually designing a quality product.

Not that graphic design and layout are particular strengths of mine.

Anyway, I was recently having a big problem with producing a PDF using Publisher 2010.  I had quite a few links in the document, so using my print-to-pdf option wasn’t going to cut it.  No problem, just use the built-in Save As PDF feature, right?

Wrong.

Save as PDF maintained the links in the Publisher document, but it did something very strange.  It changed the font color from a very particular color of green from a branding guide to plain black.

The solution came from a quick Google search.

The problem was apparently that there is a color printer installed on my computer, but a black-and-white printer is my default printer.  When I changed my default printer to a color printer, and then tried Publisher’s Save As PDF routine again, the font colors came out just as I expected.

Strange.  But workarounds are kinda par for the course for Publisher.

I can hardly wait to get the whole “department newsletter” idea converted into a blog.  I’ll gladly give up working with Publisher ever again!

Thanks to this Microsoft Community post for cluing me in to where the problem was.